Para poder usar un modem huawei en mac hay que seguir estos 6 sencillos pasos:
0.- Conectar el modem huawei al puerto USB
1.- Deshabilitar el pin de la tarjeta SIM
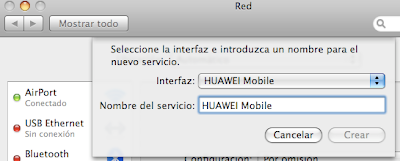
2.- Acceder a Preferencias del sistema, red y pulsar en + para crear una nueva conexión
3.- Seleccionar el interfaz y poner un nombre al servicio
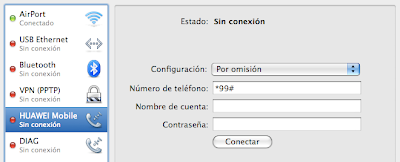
4.- Añadir el número de teléfono a marcar *99#, seleccionar Mostrar estado módem en barra de menús y pulsar en avanzado...
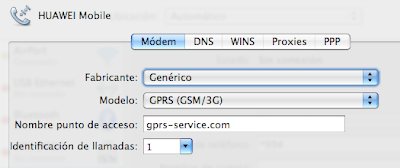
5.- Seleccionar el fabricante Genérico, modelo GPRS (GSM/3G) y añadir el nombre del punto de acceso según proveedor (ver lista a continuación)
Listado de configuraciones 3g:
Symio
apn: gprs-service.com
número: *99#
usuario y password en blanco
Yoigo
apn: internet
número: *99#
usuario y password en blanco
movistar
apn: movistar.es
número: *99#***1#
usuario: MOVISTAR
password: MOVISTAR
vodafone
apn: airtelnet.es
número: *99#
usuario: wap@wap
password: wap125
orange
apn: internet
número: *99#
usuario: orange
password: orange
ono_io
apn: internet.ono.com
número: *99#
usuario y password en blanco
Actualización: el APN de symio tenía un error y ya está ok. Gracias por el comentario.


 Nuestro amigo y lector habitual Slipknux tiene una vista de águila, y si no mirad lo que lleva en la mano Fernando Alonso, el doble campeón del mundo de
